How to Choose the Right Dispensing Machine?

Choosing the right dispensing machine starts with the material, the product, and the job it must perform. A unit that handles thin liquids may struggle with thick adhesives or abrasive pastes. A line producing thousands of precise deposits each hour has different needs from a bench used for short runs. Small details matter: viscosity, bead width, cycle time, container size, and cleaning requirements.

As [verified expert name], [role and organization], puts it: “[Insert a verified quotation about matching dispensing equipment to the application].” Confirm the quotation and credentials before publication. This guide uses that principle to compare machine types, dosing methods, control options, and support needs. It also considers practical checks, such as whether operators can adjust pressure without stopping production and whether the machine fits the available workspace.

There is no perfect machine for every application. That is worth remembering. A low purchase price may hide setup costs, while an advanced system may add features a small team rarely uses. Build a shortlist from real production requirements, then test representative materials under realistic conditions. Ask suppliers for repeatability data, service details, and a demonstration using your own containers or parts. The right dispensing machine should deliver consistent results, suit the people operating it, and leave room for sensible future changes.
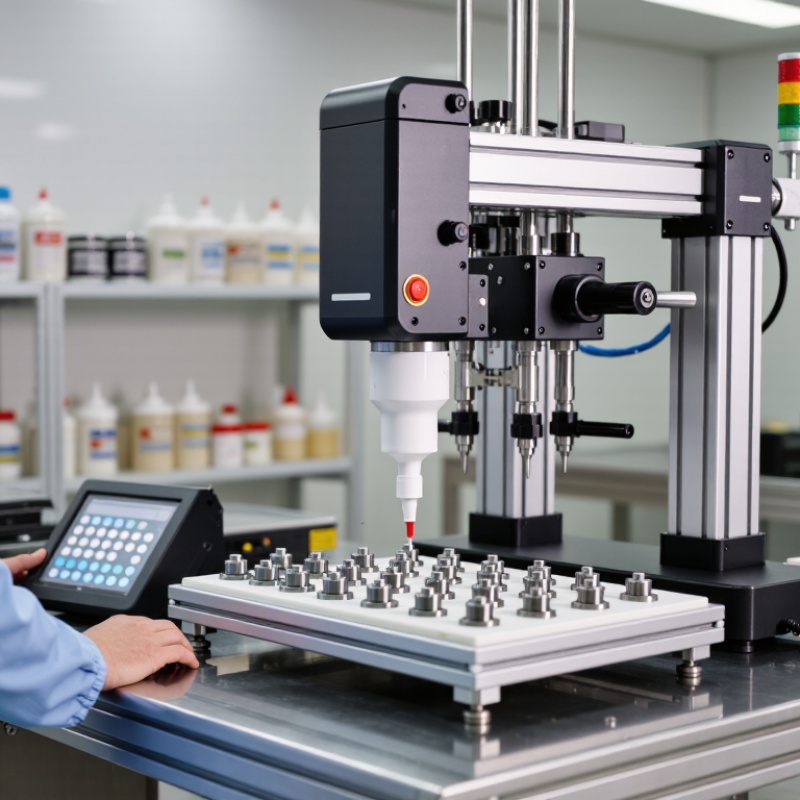
How to Choose the Right Dispensing Machine?

Define the Material: Map Viscosity, from 1 mPa·s Water-Like Fluids to Pastes

Viscosity is a useful starting point when choosing a dispensing machine, but a single number rarely tells the whole story. Water-like fluids near 1 mPa·s can run quickly through narrow lines. They may also drip after each shot. A fast shutoff valve, controlled pressure, and suck-back adjustment can help keep drops off the work surface. Test with the actual fluid, not just water; surface tension and temperature can change how it behaves.

Thicker materials need a different approach. Syrups, gels, and pastes may call for positive-displacement dosing, an auger, or a pressure-fed system. Check whether the material flows evenly or resists movement at the start. Some pastes thin under shear, while others contain particles that can clog a small nozzle. In a trial, watch the first shot, the repeat shots, and the cutoff. That matters. A neat bead on one cycle may hide inconsistent dosing over a full run.

I would not treat a datasheet viscosity as the whole answer; it is only a snapshot, often taken at one temperature and test condition. Measure or confirm viscosity near the intended operating temperature, then dispense into the real container. Note shot weight, stringing, bubbles, and how easily the line primes. I have seen teams focus on speed and miss cleanup time. The best setup is not always the fastest one; it is the one that delivers repeatable amounts without fighting the material.

Set Precision Targets: Compare ±1% Repeatability with Your Process Needs

How to Choose the Right Dispensing Machine?

Set Precision Targets: Compare ±1% Repeatability with Your Process Needs

A ±1% repeatability figure can sound impressive, but it only matters in context. Repeatability describes how consistently a machine delivers the same amount under similar conditions. It does not automatically mean every dose is within 1% of the target. For a process using 10 milliliters, a 1% variation equals 0.1 milliliters; for a 2-milliliter dose, it is just 0.02 milliliters. That difference may affect coating thickness, material use, or assembly quality. Small numbers matter.

Start with your real process, not a brochure figure. Dispense into the actual container or onto the actual part, using the material’s normal temperature and viscosity. Weigh a series of doses on a suitable scale, then compare both the average dose and the variation between doses. Keep the nozzle, pressure, and cycle time consistent. If results drift after the machine warms up, record that too. It is easy to overlook. A ±1% target may be more precision than your product needs, while a wider variation could create visible defects or costly rework. Be honest about the trade-off: tighter control can require more setup, monitoring, and maintenance. Your acceptance range should reflect the consequences of variation, not just the most attractive number on a specification sheet.

Match the Machine to the Dose: Evaluate Shot Volume, from μL to mL

How to Choose the Right Dispensing Machine?

Match the Machine to the Dose: Evaluate Shot Volume, from μL to mL

A dispensing machine should match the volume your process needs, not just its advertised maximum. For microliter doses, small variations can create noticeable differences across a tray of components. Check the machine’s minimum shot size, repeatability, and adjustment range using the material you actually dispense. Viscosity, temperature, and nozzle size can all affect delivery. A setting that works with a thin liquid may behave differently with a thicker one. Small volumes matter.

For milliliter shots, consider whether the system can deliver larger doses without slowing your cycle or producing drips. Look for clear controls, stable pressure, and a practical way to verify output. Ask for repeatability data across multiple shots, and confirm how it was measured. A single successful sample is not enough. Your production conditions may differ from a demonstration setup.

Tips: Run a short trial at your smallest and largest intended doses. Weigh or measure several consecutive shots, then compare the results with your tolerance. Keep the material, temperature, and settings consistent during testing. If the readings vary, investigate the setup before increasing speed. I would not rely on the display alone; it can look precise while the actual dose drifts.

Check Production Fit: Compare Cycle Time, Duty Cycle, and Automation Level

How to Choose the Right Dispensing Machine?

Check production fit by measuring the complete cycle, not just the time the valve is open. Include loading, positioning, dispensing, curing, and inspection. A machine that dispenses a bead in two seconds may still miss your target if each part needs lengthy handling. Test with your actual material and part geometry. Small details matter.

Compare the required output with the machine’s duty cycle: expected operating hours, shift pattern, and recovery or maintenance pauses. Then assess automation level, from manual loading to integrated part handling and inspection. The International Federation of Robotics reported 541,302 industrial robot installations worldwide in 2023 in its World Robotics 2024 report. That signals broad industrial adoption, not a guarantee that automation will pay off for every dispensing line. A production trial can reveal jams, inconsistent bead width, or operator bottlenecks that a brochure may not show. I would not rely on a single best-case cycle-time test.

Tips: Track cycle time across several runs and record rejects, pauses, and cleanup time. Compare results with your real shift target. If demand varies, a simpler setup may be the better fit.

How to Choose the Right Dispensing Machine? - Check Production Fit: Compare Cycle Time, Duty Cycle, and Automation Level

Machine Type Typical Cycle Time* Recommended Duty Cycle Automation Level Typical Throughput Best-Fit Applications Production-Fit Considerations
Manual Pneumatic Benchtop Dispenser 3–15 seconds per shot Intermittent; typically 2–6 hours per shift Low; operator-loaded and foot-pedal controlled Approximately 240–1,000 shots per 8-hour shift Prototyping, repair work, laboratories, and low-volume assembly Lowest initial complexity, but output depends strongly on operator consistency and material refill frequency.
Semi-Automatic Time-Pressure Dispenser 1–8 seconds per shot Intermittent to medium duty; normally one shift Medium-low; programmable dispense time with manual loading Approximately 600–3,000 shots per 8-hour shift Adhesive dots, sealant beads, solder paste, and repeatable small-batch work Suitable when consistent shot size is more important than fully automated part handling.
Auger Screw Dispenser 0.5–5 seconds per shot Medium to high; commonly 8–16 hours per day Medium; programmable metering with manual or automatic indexing Approximately 1,000–8,000 shots per 8-hour shift Solder paste, abrasive compounds, filled materials, and small-volume deposits Provides controlled volumetric delivery, but screw selection and material conditioning affect accuracy.
Progressive Cavity Pump Dispenser 1–10 seconds per shot High; suitable for extended, multi-shift operation Medium-high; programmable flow and synchronized motion Approximately 500–4,000 shots per 8-hour shift High-viscosity adhesives, sealants, pastes, and shear-sensitive materials Delivers stable flow at low pulsation; pump wear and compatibility with the material must be checked.
Servo Positive-Displacement Dispenser 0.3–4 seconds per shot High; designed for continuous production with planned maintenance High; closed-loop control with recipe and motion integration Approximately 1,500–10,000 shots per 8-hour shift Precision bonding, gasketing, thermal interface materials, and repeatable assembly A strong choice for high repeatability and traceability; higher purchase and integration costs are expected.
Robotic Multi-Axis Dispensing Cell 5–60 seconds per part, depending on path length High; commonly used for two or three-shift production Very high; automated loading, dispensing, inspection, and data capture options Approximately 480–5,000 parts per 8-hour shift Complex 3D beads, large assemblies, repeated product families, and high-volume manufacturing Best when labor reduction and process consistency justify programming, tooling, safety, and integration requirements.
Production-fit note: Actual cycle time varies with shot volume, bead length, viscosity, pressure, nozzle size, part handling, and curing requirements. Confirm the required output using the formula: Required cycle time per part = Available production time ÷ Required good parts. Allow additional time for loading, material refilling, nozzle cleaning, changeovers, inspection, and planned maintenance.

Validate Total Cost: Weigh Tooling, Maintenance, and Expected Service Life

How to Choose the Right Dispensing Machine?

A dispensing machine should be judged by its working life, not its purchase price. Tooling often creates the first hidden expense. Custom nozzles, fixtures, and cartridges may cost more than expected. Ask for tooling prices, replacement intervals, and adjustment requirements before approval. A machine that needs weekly setup changes can consume valuable technician hours. Record these hours honestly. Estimates are often too optimistic.

Maintenance deserves equal attention. Check calibration procedures, cleaning time, spare-part availability, and service response. A ten-minute cleaning task becomes expensive when repeated across three shifts. Expected service life also matters. Compare the machine’s rated cycles with your actual production schedule. For example, 500,000 cycles may sound impressive, but heavy daily use can shorten that period. Environmental conditions, material viscosity, and operator habits can change results. Published figures are useful, but they are not guarantees.

Tips: Request a five-year cost worksheet from the supplier. Include tooling, labor, utilities, training, repairs, and planned downtime. Test sample parts during a realistic production run. Inspect the first and last pieces for consistency. Ask current users about failures, not only successes. A lower-cost model may still be the right choice, but only after its risks are visible. I would also leave room for uncertainty. Unexpected repairs happen, and ignoring them weakens the entire calculation.

How to Choose the Right Dispensing Machine? Validate Total Cost

Compare annualized equipment and tooling costs with expected yearly maintenance—not just the initial purchase price.

Illustrative estimates in USD per year. Equipment and tooling costs are spread over the expected service life; maintenance is estimated annually. Assumed service lives: manual benchtop, 5 years; semi-automatic benchtop, 7 years; automated system, 10 years. Actual costs depend on application, usage, tooling requirements, and local service rates.